Step Six: Galaga Sound Repair
If your Galaga machine plays great otherwise, but you just can’t hear anything. First open the coin door or better to go through the back of the game and see it there is a volume potentiometer or commonly called “pot”, either installed on the near side of the coin door, or more likely if this is an original galaga game you can find your volume adjust pot on the PCB itself.
When found adjust it while the game is On and playing. If you hear a short– meaning all of the sudden it comes on then goes off again; you have a short in your potentiometer.
If the Pot is located inside the cabinet away from the game PCB then these are more than likely a 5k potentiometer that can be replaced very easily.
However you might want to try simply re-soldering the wires going to the potentiometer as sometimes over the 30 plus years of the game’s life these can break or lose connectivity. So if you sometimes hear sound then more than likely simply re-soldering the wires will fix it. Or you can just replace the 5k potetniometer all together with a brand new one.
Try adjusting it and see if you get an increase in sound. If you still hear no sound, next trace the wires back from the speaker which is located behind the marquee of the original Galaga game cabinet (Yours could be in a different location if your Galaga is/was installed in a non original cabinet) and see if there’s not a break or something loose or disconnected from the speaker. If all this tests good, you might just try to replace the original speaker.
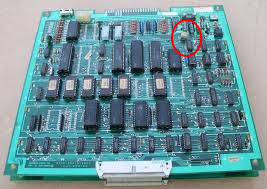
(The Speaker is only an 8 ohm and can be replaced very cheaply) If you still have no sound with a new speaker installed, then you have a problem within your PCB transmitting the sound out from the game. This would be a very technical fix, probably better to just go on Ebay or Online and simply buy a new working original Galaga PCB. Please refer to installing a Galaga PCB post to install a new one.
If you are technical and want to try; here are a few common sound problem fixes to try:
sound fixes:
10/16/2001
Problem: Sound fades in and out at random times.
Solution: Bad electrolytic caps, C20, C21, C22 on the CPU board.
10/16/2001
Problem: Board would hang at the ROM OK during boot.
Solution: Broken pin 11 on the ROM socket at 3J.
10/16/2001
Problem: Fire button doesn’t work.
Solution: Bad ROM at 3N on the CPU board.
11/14/2001
Problem: Streaks of graphics trails coming off to the left of many of the characters.
Solution: Pin 12 on the Custom 04xx IC at 4M on the video board was broken and making intermittent contact with the chip. It was repaired by soldering on a new leg, then inserting it into a new socket. That socket was then inserted into the original socket.
11/14/2001
Problem: Players ship and the Galaga character have every other horizontal line either missing or mixed up.
Solution: Replaced the eight 2147 rams with two 2149 (2148 equivalent) rams.
12/19/2001
Problem: Dead board
First step was to clean all the customs. After this I had the self-test starting, but it would constantly reset itself in the middle, or just hang. I replaced the socket on the 07XX and the board would then go thru it’s diags and boot into the attract mode.
Solution: Bad Socket on the 07xx custom on the CPU board at 4D, dirty custom chip legs
12/19/2001
Problem: No sound except BOOM.
Solution: Bad resistor pack at RM2 on the CPU board
12/19/2001
Problem: When the enemies entry the playfield, they are all bunched together. Board will reset occasionally.
Solution: Bad custom chip at 2J on the CPU board
12/19/2001
Problem: Board would reset itself. Happened more often as the board was on longer.
I was pretty sure there was a heat problem so I touched the top of the chips on the CPU board with my finger and found the main CPU at 4M was getting really hot. I started to grab the freeze spray to determine if that was the problem when I noticed the CPU was a standard Z-80 and not a Z-80A.
Solution: Replace the CPU at 4M with a Z-80A, it had a standard Z-80 instead!!!
12/19/2001
Problem: Dips switches have no effect
Solution: Bad 74LS151 at 4K had stuck outputs on the CPU board
12/19/2001
Problem: Game plays, but star field was erratic. Sprites would streak horizontally and the game would lose video sync, sometimes a row of white or light blue zeros would appear at the top and bottom of the screen.
When I first fired up the board I would have sworn it was a bad 2147 video ram. So I replace all 8 with 2 2149 rams, (2148 equivalents). This changed nothing. Next I looked at the LS161s on the video board seeing that now it was losing the picture altogether now on occasion. They all seemed fine. Then I looked at the star field generator chips making sure it was seated well and the legs were all clean. I knew there was a problem with timing, but not sure why I turned my attention to the chip next to the star field chip. I grabbed a LS368 and piggybacked it on 3N and the display cleaned right up. I replaced the chip and all is well.
Solution: Bad 74LS368 at 3N on the video board
2/14/2002 – From Brian Crowe
Problem: Game plays but enemies and the player’s ship is missing.
Solution: bad 74LS20 at location 3A on the video pcb
3/16/2003
Problem: Sprites would kind of fade in an out, like they where only being partially drawn
Solution: Cleaned legs on Custom 07xx chip at 1N on the Video board
3/16/2003
Problem: Split screen, left hand side of screen was displayed twice, with a garbled vertical line of red jumbled letters down the center (the high score display).
Solution: Cleaned dirty legs of the custom 08XX chip at 2E on the CPU board
3/16/2003
Problem: Garbled sound. Boom! was fine, but the rest was short chirping sounds
Solution: Cleaned legs on custom chip 07XX at 4D on the CPU board
3/17/2002
Problem: Dead board, no clock to the CPU.
First thing I checked was the clock to the CPU, none, next checked the crystal and it was pulsing. The LS368 at 5A was fine as was the LS107 at 5B. The clock then goes to pin 1 of the 07xx chip at 5D. It was pulsing and so were a few of the outputs, but most were floating. (nothing on the logic probe). I replaced the 07XX and the same thing. Just for fun I changed the socket. I now had clock to the CPU. Better, but the board now hangs at ROM OK! See the next entry for the log on that problem.
Solution: Bad socket on the 07xx custom at 5D
3/17/2002
Problem: board boots but hangs at ROM OK.
Testing the reset lines on the 3 CPUs shows that they are going high when they are supposed to. Then checking the address and data lines on each individually shows that CPU 3, the Z-80 at 5E was not getting any data back on the data lines. I swapped the socket and reinserted the CPU, the board then fired up.
Solution: Bad socket on the Z-80 at 5E on the CPU board
3/17/2002
Problem: Sound volume really low, you can adjust it with the sound pot, but it’s still very faint all the way up.
Solution: Open electrolytic capacitor C20, 22uf @ 10VDC
01/28/2004
Problem: Ram 4L Error
This was a fun one to track down. It was a video board problem for sure. I tried a known working CPU board with it with the same results, 4L error. After replacing the LS245 at 2H, , the RAM and socket at 3H, replaced the socket on the 04xx custom at 1H and the LS08 (chip select circuit), the board sill came up with the same error. I traced out all the connections from the rams to ensure the traces/connections were solid and they were. After that, I hit the lines with a logic probe with power on. Everything seem fine. I then check the connections on the LS08 at 1H and found pin 4 to be floating. Checking the schematics, this is an input from pin 12 of the LS138 at 1E. Pin 12 of the LS138 was pulsing, but nothing on the LS08, pin 4. I jumpered between the two and rebooted the board. This time it passed the RAM test and I had a working board.
Solution: Repaired broken trace between pin 12 of the LS138 at 1E and pin 4 of the LS08 at 1H.

